Large Assembly Management with Volatile Ghosting in 3DEXPERIENCE CATIA

When working with large assemblies, visualizing each and every component of assembly is very important in design process. Often it is tough to see all the hidden details in the large assemblies.

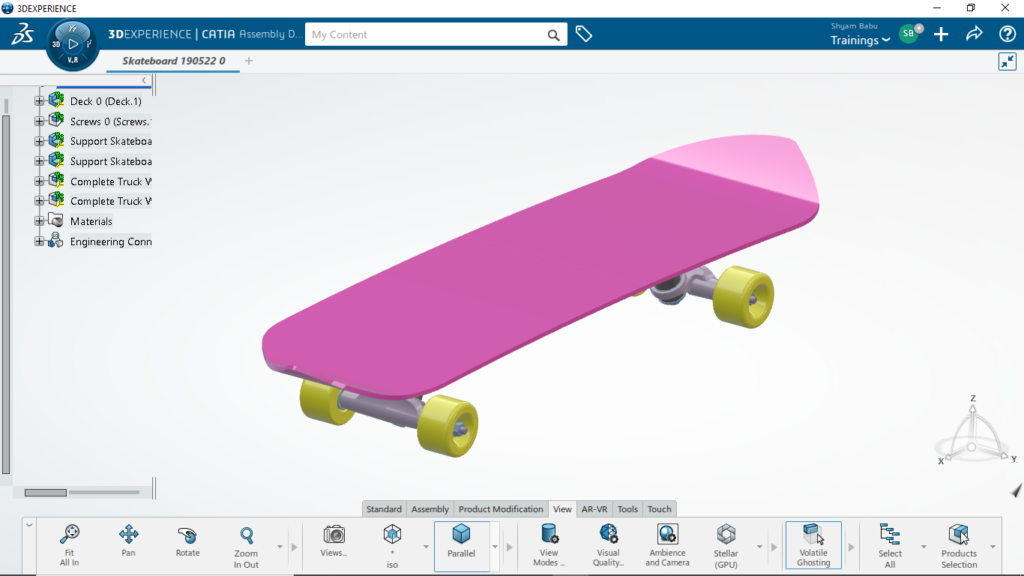
Thanks to the features in 3DEXPERIENCE CATIA, elements can be temporarily hidden behind or inside the model to display hidden details.

This is done with the help of Volatile Ghosting tool.

Steps to Ghost and Un-ghost objects in assembly

  • Open the assembly in Assembly Design App

  • Go the Viewsection of the action bar, click Volatile Ghosting   to activate the command.

  • Once the command is activated, move the mouse cursor over the model, press ALT+G or press ALT and scroll up mouse Parts located underneath the pointer are not visible anymore.
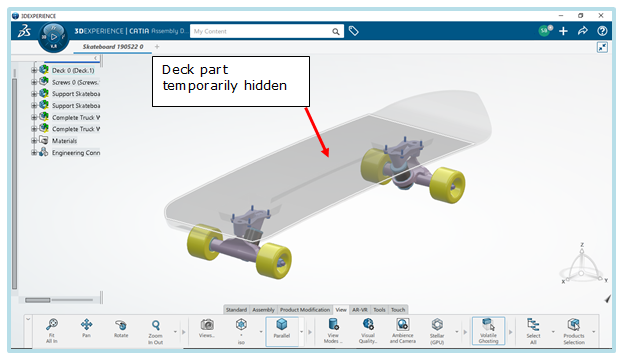
  • Repeat the press or scroll action to keep on hiding pointed parts.
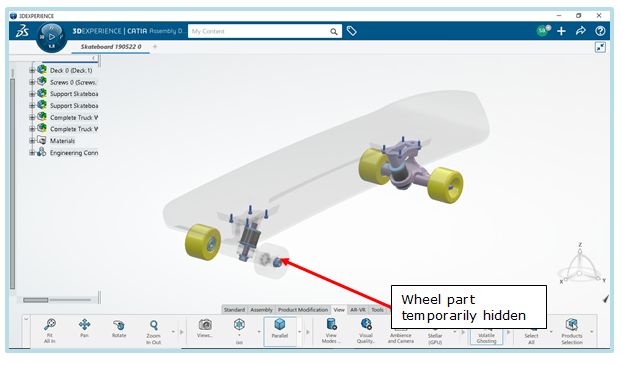
Now, to show the temporarily hidden parts, the below steps have to be followed:

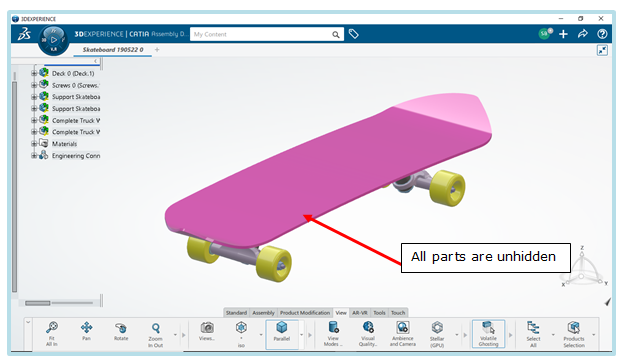
  • Press ALT + scroll down. Hidden parts reappear one by one on each scroll action.
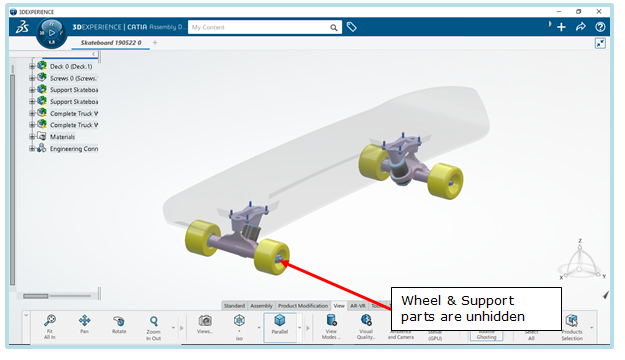
  • HoldALT while hovering over the model, the ghosting effect is kept.
  • Leave ALTkey, the ghosting effect is gone.

By following above steps, one can hide the objects temporarily and visualize the details easily with 3DEXPERIENCE CATIA

Large Assembly Management in CATIA V5

Working with large assemblies in the CATIA V5 system can be very demanding. Even with the use of extremely powerful machines and workstations, working with large assemblies often leads to the crashing of the system with the error message “Click OK to terminate” appearing. To avoid this error, this blog discusses some recommendations for optimizing the system to minimize the crashing of the program and to make it easy to work with large assembly sets.

  1. Cache System
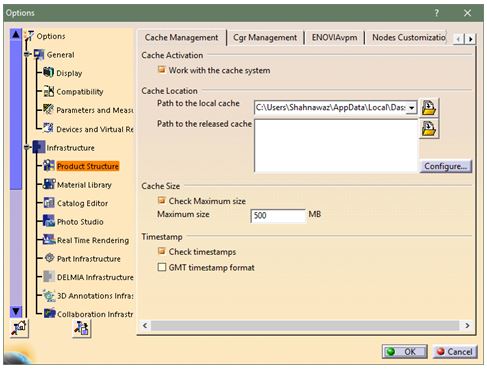
    System’s performance can be increased with the help of cache. When this option is activated, CATIA loads all parts of the set in visualization mode while not loading the whole history of the part. This helps in reducing the load on computer/system memory.

    To activate Cache System, click on Tools ➜ Options ➜ Infrastructure ➜ Product Structure ➜ under Cache Management tab, click “Work with the cache system.”

    large-assembly-1

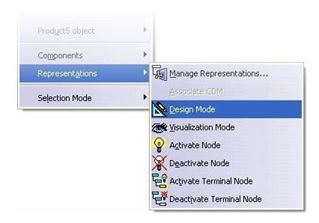
    After restarting the program, CATIA will reload parts in visualization mode. If the part needs to be edited, switch to Design Mode which can be done by right clicking the part and selecting Representations and Design Mode.

    large-assembly-1

  1. CGR Management

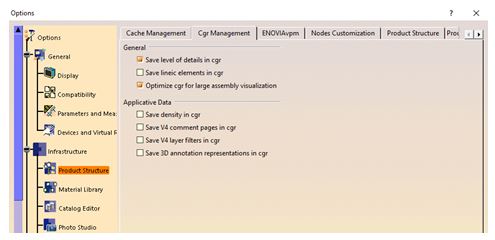
    For large assemblies, CGR formats can be optimized. To optimize CGR formats, click on Tools ➜ Options ➜ Infrastructure ➜ Product Structure ➜ CGR Management tab.

    large-assembly-1

  1. Display Option
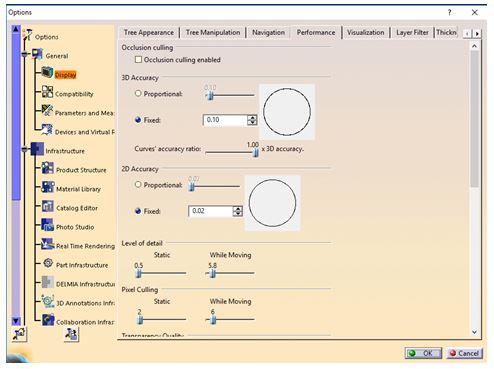
    The changes in display options can be made in Performance Settings tab which will improve the results.

    Click on Tools ➜ Options ➜ General ➜ Display ➜ Performance tab.

    It is recommended to turn off Occlusion Culling and set 3D Accuracy to 0.1 (increase in value improves performance), increase Level of Detail while Moving (increasing the value improves performance), increase Pixel culling while Moving (increasing the value improves performance).

    large-assembly-1

  1. Disable Automatic Saving
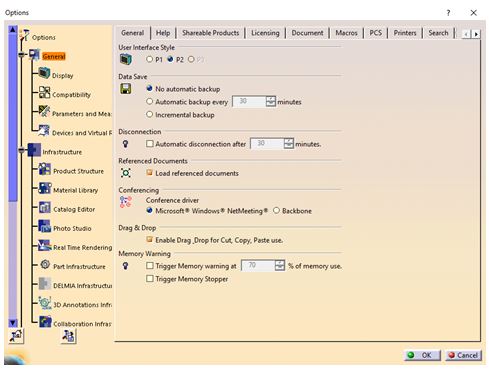
    By default, data is saved every 30 minutes in CATIA. System usually slows down while saving. The automatic data saving can be turned off by clicking  Tools ➜ Options ➜ General tab and turning on No automatic backup in the Data Save settings.

    large-assembly-1

  1. Stack Size
    The total number of “Undo” operations assigned to the CATIA session is the stack size. Reducing this number increases the memory capacity and thus the performance. Stack size can be changed by clicking on the PCS tab in the General menu.

    large-assembly-1

  1. Product Visualization Representation
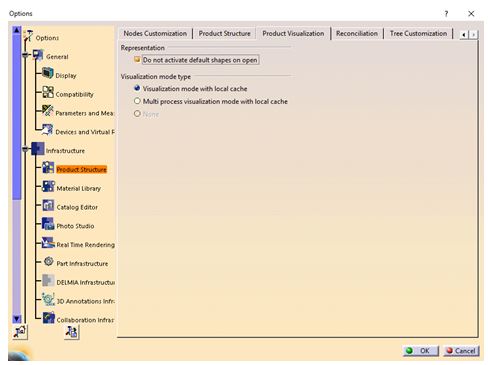
    The memory utilization will improve if sets are open in such a way that all components are deactivated and subsequently activated as needed. To change this setting, Do not activate default shapes on open option needs to be enabled within the Product Visualization (Tools ➜ Options ➜ Infrastructure ➜ Product Structure) menu.

    large-assembly-1

Subscribe to our newsletter

Get all the latest information on Events, Sales and Offers.